Real Android - the actual operating system, not an emulator running inside Windows - can live on a portable SSD and boot on almost any PC.
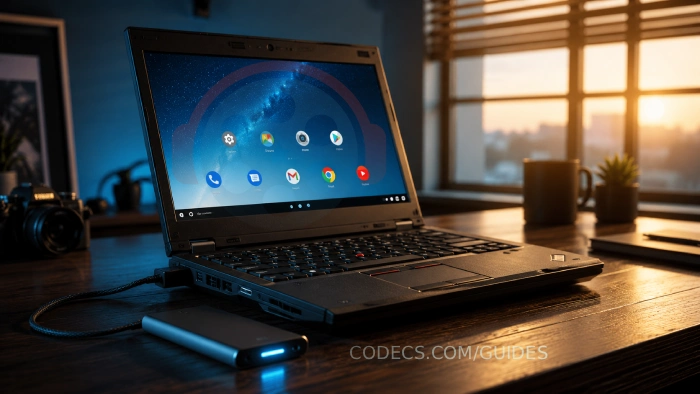
Nothing gets installed on your hard drive, and Windows stays exactly as it is.
Plug in the SSD, pick it from the boot menu, and you get a full Android desktop with the Play Store.
This guide covers which Android build to use, how to write and install it safely, and the BIOS settings that get it booting first time.
Why Run Android From an SSD?
A portable SSD keeps Android completely separate from your PC. Unplug it, and your computer is back to normal.
- Use Android apps without an emulator. Android runs directly on your hardware, so it usually feels quicker than an app player inside Windows.
- Revive an old laptop. A machine that crawls under Windows 11 can feel lively again running Android.
- Keep things separate. Apps you try on the SSD live on their own drive, away from your Windows files.
- Test your own apps. Developers get a real Android device with a proper keyboard, mouse and big screen.
- It's free. No licence key, no activation, no account needed to get started.
Which Android Build Should You Use?
A handful of community projects make Android run on normal Intel and AMD PCs. They are not equally alive.
| Project | Based on | Latest public build | Verdict |
|---|---|---|---|
| Bliss OS 16 | Android 13 | 16.9.7, October 2024 | Best pick for most PCs |
| Android-x86 | Android 9 | 9.0-r2, March 2020 | Only for old hardware where Bliss OS fails |
| PrimeOS | Android 11 | 2.1.3 beta, July 2022 | Desktop-style, but no longer updated |
| Phoenix OS | Android 7.1 | No official source | Skip it |
Bliss OS is the one to start with. Bliss OS boots on both modern UEFI PCs and older BIOS machines, supports most graphics chips, and adds a desktop-style taskbar with windowed apps.
Android-x86 is the original project. Android-x86 hasn't had a release since 2020, so many current apps won't install, but it can still help on 2014-2018 laptops with Intel graphics.
PrimeOS turns Android into a Windows-like desktop with a Start menu and keyboard mapping for games. Its last public build is a 2022 beta, so treat it as a curiosity rather than a daily driver.
What You Need
- A portable SSD - 64 GB minimum, 256 GB or more if you plan to install lots of apps. Any USB 3.0 or faster drive works. Everything on it will be erased.
- A USB stick of 8 GB or more - used once, to boot the Bliss OS installer.
- A PC that can boot from USB - almost anything made in the last 15 years.
- The Bliss OS ISO - about 2.4 GB.
- An ISO writing tool - X Drive Writer or Rufus, both covered below.
- About 30 minutes - most of it is downloading and copying.
Installing Bliss OS erases the SSD, and Windows won't be able to read it afterwards. Copy anything you want to keep off the drive first.
Not sure an SSD is worth it over a stick? See USB Stick vs SSD: Which Storage Solution Should You Buy?
Step 1 - Download the Bliss OS ISO
Open the official Bliss OS downloads on SourceForge. The folders are confusing at first, so follow this path.
Go to BlissOS16, then Gapps, then Generic. Download the newest .iso file there - at the time of writing, Bliss-v16.9.7-x86_64-OFFICIAL-gapps-20241011.iso.
Don't click the big green download button. It grabs whatever file was uploaded last, which is often a build for Surface tablets or one without Google Play.
The folder names mean:
- Gapps - includes the Google Play Store. This is what most people want, and what this guide assumes.
- FOSS - no Google apps, with F-Droid instead. Many banking, streaming and game apps won't work.
- Vanilla - plain Android with no app store at all.
- Generic vs Surface - pick Generic unless you own a Microsoft Surface.
Grab the matching .sha256 file from the same folder too. Checking it takes seconds and catches a broken download before it wastes your time.
Step 2 - Write the ISO to a USB Stick
X Drive Writer (recommended). X Drive Writer is a free, portable Windows tool of about 10 MB. It hides your Windows system drive from the list, and it keeps internal drives out of sight unless you tick an advanced option.
- Plug in the USB stick and run X Drive Writer. It asks for admin rights, which it needs to write the drive.
- Click Browse and pick the Bliss OS ISO.
- Select your USB stick as the target.
- Choose DD mode. Android ISOs need a byte-for-byte copy - the Partition + Extract mode is for Windows installers.
- Click Write to Drive, confirm, and wait a minute or two.
Rufus (alternative). Rufus works just as well if you already use it. Select the stick under Device, pick the ISO, press START, and choose DD Image mode when Rufus asks.
Check the Device list twice in Rufus. It doesn't hide drives the way X Drive Writer does, so picking the wrong one wipes it.
Just want a quick look? You can write the ISO straight to the SSD and boot it in Live mode to test your hardware. Nothing you do in a live session is saved, though - apps, accounts and settings vanish at the next reboot.
Want several systems on one drive? Ventoy lets you drop multiple ISOs on one USB drive and pick one at startup. Many Android-x86-based builds boot this way, but not all - if yours doesn't, use DD mode. Our guide to booting several ISOs from one USB drive with Ventoy shows the setup.
Step 3 - Boot the PC From the USB Stick
Plug in both the USB stick and the portable SSD, then turn the PC on and tap the boot menu key straight away.
| PC brand | Usual boot menu key |
|---|---|
| Lenovo, Dell, Acer | F12 |
| HP | F9 (or Esc, then F9) |
| ASUS | F8 or Esc |
| MSI | F11 |
| Custom-built | F12, F11, F8 or Esc |
Pick the USB stick from the list. It usually shows up as "USB HDD" or by its brand name.
Stick not listed? Secure Boot is the usual reason, because most Android-for-PC builds aren't signed for it. Open the BIOS setup (usually F2 or Del at startup), turn Secure Boot off under the Security or Boot tab, and try again.
You can switch Secure Boot back on when you go back to Windows full-time.
Step 4 - Install Bliss OS Onto the SSD
The Bliss OS boot menu offers a live option and an install option. Try live first to make sure your screen, mouse and Wi-Fi work - then reboot and choose install.
- Choose the installation entry from the Bliss OS boot menu.
- When the installer lists drives, pick your portable SSD. Check the size and name carefully - your internal Windows drive is in that list too.
- Let the installer format the SSD. Choose ext4 if it asks for a file system.
- Say yes when it offers to install the boot loader, so the SSD can start on its own.
- When it finishes, shut down and remove the USB stick.
Pick the right drive. The installer erases whatever you select. If two drives look alike, unplug the stick and go by the size of your SSD.
From now on, plug in the SSD, choose it from the boot menu, and Android starts with all your apps and settings still there.
Step 5 - First Boot Setup
The Android setup wizard runs just like on a new phone: language, Wi-Fi and Google account.
Wi-Fi is the most common snag. Intel, Atheros and most Realtek chips usually work, but some older Broadcom cards don't. If Wi-Fi fails, plug in an Ethernet cable - wired networking works out of the box.
Sign in with a Google account to use the Play Store, or skip it to run Android offline.
Tips for Better Speed
- Use a USB 3.0 or faster port. A USB 2.0 port works but makes apps slow to open. Blue ports and USB-C ports are usually the fast ones.
- Intel graphics work best. AMD Radeon is generally fine. NVIDIA support is patchy, so check the Bliss OS community for your card.
- ARM-only apps run slower. Bliss OS can translate apps built only for phone chips, but they won't be as quick as apps with a PC version.
Troubleshooting
The drive doesn't appear in the boot menu. Turn off Secure Boot first. If it still doesn't show, try a different USB port - older PCs sometimes only boot from USB 2.0 or 3.0 ports, not the newest ones.
Black screen after boot. This is usually a graphics driver problem. In the Bliss OS boot menu, press e to edit the selected entry, add nomodeset to the end of the line that starts with linux, and press F10 or Ctrl+X to boot.
No Wi-Fi. Your Wi-Fi card probably has no driver. Use an Ethernet cable, or try a USB Wi-Fi adapter.
Touchscreen doesn't respond on a 2-in-1. Bliss OS handles most touchscreens, while Android-x86 often doesn't. Stay with Bliss OS on convertibles.
Windows no longer shows the SSD. That's expected. Android uses a Linux file system that Windows can't read, so File Explorer shows no drive letter, and Disk Management may list the partitions without letters.
Don't click Format. If Windows says you need to format the disk before using it, click Cancel. Formatting wipes your Android install - the drive is fine, Windows just can't read it.
Want the SSD back for Windows? Open Disk Management, delete each partition on the SSD, then create a new simple volume formatted as exFAT or NTFS. This removes Android completely.
Want Android and a Windows-readable area on one SSD? Boot a Linux live USB and use GParted to shrink the Android partition, then add an exFAT partition in the free space. Windows sees only the exFAT part, and Android still boots.
Quick questions
Will this change anything on my Windows drive?
No, as long as you pick the portable SSD in the installer. Bliss OS and its boot loader go onto the SSD, and your PC starts Windows as normal when the SSD is unplugged.
Why did my apps disappear after a reboot?
You were running Live mode, which saves nothing. Install Bliss OS onto the SSD as shown in Step 4 and your apps and settings stay.
Can I use a USB stick instead of an SSD?
Yes, but it will be much slower. Android reads and writes lots of small files, which is where portable SSDs are far faster than typical sticks.
Does the Google Play Store work?
Yes, with the Gapps build. A few apps that check for a certified phone may refuse to install or run.
Android in your pocket, for any PC
A portable SSD and a free Bliss OS build turn almost any PC into an Android machine, without touching Windows.
Write the ISO with X Drive Writer, install Bliss OS onto the SSD, and boot. The hardest part is choosing which apps to install first.


Don't Open a .xmpeg File Before Reading This
3/5It's never a good sign when the potential malware you downloaded has the EXACT same filename as the example. ...
Read More →Free Popular IPTV Playlist: Where to Get Fres...
3/5How can you create a DSTV channels on IPTV?
Read More →How to Download HEVC Video Extension for Free
5/5Does anyone have the HEVC Video Extensions as an .exe file and can provide a download link?
Read More →