The voices land a beat after the lips move, and it ruins everything. Here are five fixes for out-of-sync MP4 audio - including the MP4 Splitter setup that fixes it at the source.
You start an MP4 and the sound is off. Dialogue trails behind the picture, or runs slightly ahead of it. Once you notice the lip-sync lag, you cannot unnotice it.
The good news: this is almost always fixable in a few minutes. The fixes below run from the fastest temporary patch to the change that stops it happening at all.
Pinning down when the drift happens points you straight at the fix:
Sync is off from the first second - likely a splitter or decoder timestamp issue (Fix 3-4). Sync slowly drifts the longer you watch - usually a frame-rate or renderer mismatch (Fix 2, 4). Only this one file is affected - the file itself may be the problem (Fix 5). Every player does it - the cause is system-wide, not the app.
Fix 1: Nudge the audio delay manually (instant patch)
Every good player lets you shift the audio against the video in real time. This does not cure the cause, but it gets you watching in seconds.
In MPC-HC or MPC-BE, the default keys are simple.
- Press the + key to push audio later, - to pull it earlier. Each press shifts by 10ms.
- In VLC, use J and K to do the same.
- Watch a few seconds of clear dialogue and adjust until the lips match.
If a small fixed offset fixes it perfectly and it stays fixed, the file simply has a baked-in delay and this is all you need.
Fix 2: Switch the video renderer
A renderer that does not match your hardware causes frames to land late, which reads as drift that gets worse over time.
In MPC-HC or MPC-BE, open View > Options > Output. Try a different video renderer - MPC Video Renderer first, then EVR Custom.
Restart playback after each change and watch for the drift. This single setting resolves a surprising share of progressive-sync problems.
Fix 3: Use a dedicated audio renderer
The default DirectShow audio path adds latency that can knock sound slightly out of step, especially on HDMI or external audio gear.
The MPC Audio Renderer is built to avoid this - low-latency output with frame-accurate sync, which is exactly what drifting audio needs.
Install it, then select it as your audio renderer in Options > Output. For HDMI setups specifically, our guide on fixing no-sound and dropout issues on HDR videos covers the renderer choices that handle handshake delays best.
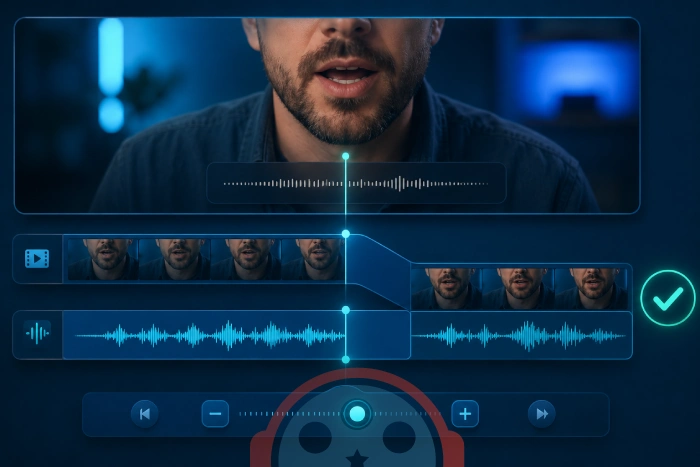
Fix 4: Configure MP4 Splitter - the real root cause
If sync is wrong from the very first second across multiple files, the problem is upstream of your renderer. The splitter is handing out misaligned timestamps.
The splitter (or demuxer) reads the MP4 container and separates the audio and video streams before they reach your decoders. When a weak or wrong splitter wins the priority fight, it feeds those streams in with their timestamps already off - and no amount of renderer tweaking downstream will fix it.
The lasting cure is to install a dedicated splitter and tell your player to prefer it. MP4 Splitter is a lightweight DirectShow filter that parses MP4 containers cleanly and keeps the audio and video timestamps locked together from the start.
Here is how to wire it into MPC-BE:
- Install MP4 Splitter. It registers itself as a DirectShow filter on your system. Restart MPC-BE if it was open.
- In MPC-BE, open View > Options and click External Filters in the left pane.
- Click Add Filter..., select MPC MP4/MOV Splitter from the list, and click OK.
- With the filter selected, choose the Prefer radio option. This forces MPC-BE to use it ahead of any weaker built-in splitter.
- Click Apply, then OK, and reopen your file.
To confirm it took, play the file, right-click the video and open Filters. You should see MPC MP4/MOV Source in the active graph - that means the splitter is now handling your MP4 and feeding aligned streams to the decoders.
For the full walkthrough with screenshots, plus a stutter-and-black-screen troubleshooting checklist, see our companion guide on configuring MP4 Splitter for smooth, stutter-free playback.
The other upstream culprit is an overloaded decoder. If the file is heavy 4K HEVC and your CPU is straining to keep up, frames arrive late and sync slips - set up hardware-accelerated HEVC with LAV Filters to offload decoding to your GPU.
If sync is wrong in every player and every app, the DirectShow setup itself may be in a bad state.
The Codec Tweak Tool resets filters and audio output to known-good defaults and re-registers the DirectShow pipeline - the fastest way to clear a tangled system-wide config.
Fix 5: Rule out the file itself
Sometimes nothing is wrong with your setup - the file was encoded with bad timestamps or a variable frame rate your player struggles to follow.
Test another MP4. If everything else plays in perfect sync and only this one drifts, the file is the culprit.
To confirm, read what is actually inside it. Our guide on checking what codec and filters a video uses shows how to spot a variable frame rate or odd codec in seconds. For a permanent fix, re-encoding the file to a constant frame rate removes the drift for good.

")


How to Download HEVC Video Extension for Free
Thanks a lot!It really works well.I hate the asus.So creepy.
Read More →How to play FLAC files in Windows Media Playe...
@Drasko What is the error message you're seeing? Can you provide more details?
Read More →The Best Video Player for Android TV - And th...
On Android, Kodi has far the best foreign language subtitle support. Vlc and MX had issues displaying the correct ...
Read More →