Helium Converter is a versatile software that supports the conversion of various file types into different formats.
It can convert audio and video files with ease.
Download Helium Converter First →
Ready to master audio conversion in under 8 minutes?
This guide shows you exactly how to get professional results from Helium Audio Converter, whether you're converting a single file or processing hundreds of audio tracks.
Before You Start: What You'll Achieve
After following this guide, you'll be able to convert any audio file between MP3, FLAC, WAV, AAC, M4A, OGG, and WMA formats while maintaining perfect quality.
No technical background required.
Compatible Formats: AAC, FLAC, M4A, M4B, M4P, Monkey Audio (APE), MP3, MP4, MPC, Ogg Vorbis, WavPack, Wave, and WMA - convert between any combination instantly.
Quick Start: 7 Steps to Perfect Audio Conversion
Step 1: Install Helium Converter (2 minutes)
Download Helium Converter here and run the installer. The setup process is completely automated - no complicated configuration needed.
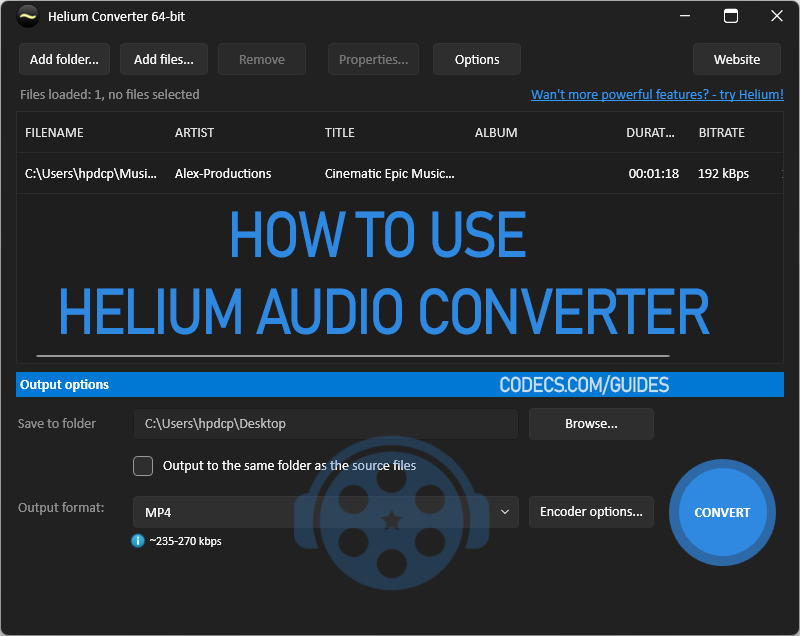
Launch the application after installation completes. You'll see a clean, intuitive interface designed for immediate use.
Step 2: Add Your Audio Files
Click "Add Files" (or press Ctrl+Shift+W) in the upper left corner. Browse and select the audio files you want to convert.
Step 3: Choose Your Target Format
Click the "Output Format" dropdown at the bottom of the window. Select your desired format based on your needs:
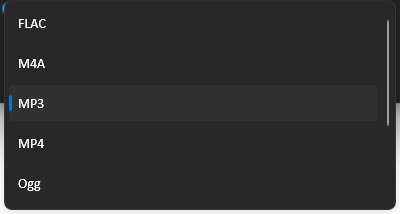
- MP3: Universal compatibility, smaller file sizes.
- FLAC: Lossless quality for archival purposes.
- WAV: Uncompressed for professional audio work.
- AAC: Optimized for Apple devices and streaming.
- etc.
Step 4: Set Output Destination
Click "Browse" to choose where converted files will be saved. Create a dedicated "Converted Audio" folder to keep your workflow organized.

Step 5: Optimize Quality Settings
Click "Encoder Options" next to the Output Format dropdown to access professional settings:
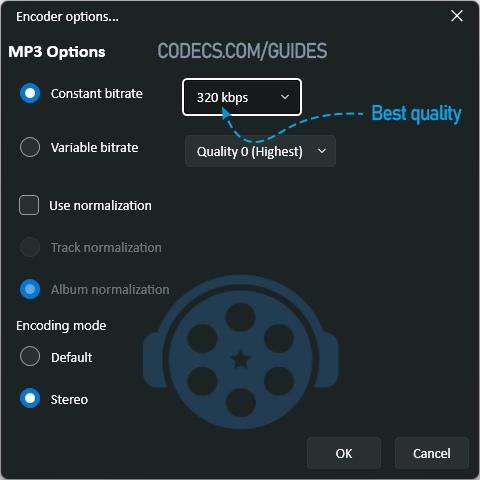
- MP3: Adjust bitrate (128-320kbps), normalization, and encoding mode.
- FLAC: Set compression level for file size vs. speed balance.
- WAV: Configure sample rate and bit depth for your requirements.
Recommended Settings: 320kbps for MP3, Level 5 compression for FLAC, 44.1kHz/16-bit for WAV.
Step 6: Start Converting
Click the "Convert" button in the lower right corner.
Helium Converter processes files rapidly - most conversions complete in under 30 seconds per file.
Monitor progress in the status window. Large batch conversions run automatically in the background.
Step 7: Verify Your Results
Check your output folder to confirm successful conversion.
Test converted files in your preferred audio player to ensure quality meets your standards.
Troubleshooting Common Issues
Slow Conversion: Close other applications to free up system resources. Large FLAC files naturally take longer to process.
Quality Loss: Verify source file quality first. Converting from lossy to lossless formats won't improve original quality.
Format Compatibility: Double-check that your target device supports the chosen output format before converting.
For example, converting to FLAC won't help if your car stereo only plays MP3 and WAV files.
Get Started Today
Stop struggling with complicated audio conversion software. Helium Converter delivers professional results without the learning curve.
Download Helium Converter Now →
Next Steps: Once you've mastered basic conversion, explore advanced codec and format options to optimize your audio workflow further.


Free Popular IPTV Playlist: Where to Get Fres...
Thanx. It real useful.
Read More →How to Download HEVC Video Extension for Free
Still works July 2026!
Read More →VBR vs CBR MP3: Better Sound at Half the Size...
Best encoding MP3 only ABR. Audio Quality: ABR>VBR>CBR but for some reason they are trying to hide ...
Read More →