AV1 is crushing the competition. With 50% better compression than H.264 and no licensing fees, it's becoming the go-to codec for streaming giants like Netflix and YouTube.

But here's the catch - encoding AV1 can be painfully slow with standard tools.
Enter rav1e. This Rust-based encoder from the Xiph Foundation offers the perfect balance of speed and quality.
Paired with FFmpeg, you get a powerhouse combo that turns any video into efficient AV1 files.
This guide walks you through the exact commands and settings to get professional results.
What Makes rav1e Different?
Unlike the reference AV1 encoder (libaom), rav1e was built from scratch with speed in mind. It's written in Rust for memory safety and ships with assembly optimizations for x86 and ARM processors.
The tradeoff? You might lose a few percentage points of compression efficiency compared to libaom. But when libaom takes 10x longer to encode, that difference rarely matters for real-world projects.
Key Benefits of rav1e
- Speed: Significantly faster than libaom for most use cases.
- Safety: Memory-safe Rust code means fewer crashes and bugs.
- Reliability: Consistent results across different content types.
- Royalty-Free: No licensing fees - ever.
Step 1: Download the Required Tools
You'll need two pieces of software. First, grab the latest FFmpeg build - it handles the video decoding and audio processing.
Then download rav1e for the actual AV1 encoding.
Extract both to a folder you can easily access from the command line. For Windows users, adding these to your system PATH makes life much easier.
Quick verification: Open your terminal and run:
ffmpeg -version
rav1e --version
Both commands should return version information. If you get "command not found" errors, double-check your PATH settings.
Step 2: Understanding the Basic Command Structure
Here's how the FFmpeg-to-rav1e pipeline works. FFmpeg reads your source video, converts it to a raw format rav1e understands (Y4M), then pipes it directly to the encoder.

The simplest working command looks like this:
ffmpeg -i input.mp4 -pix_fmt yuv420p -f yuv4mpegpipe - | rav1e - -o output.ivf --quantizer 80Let's break this down:
-
-i input.mp4: Your source video file. -
-pix_fmt yuv420p: Standard 8-bit color format. -
-f yuv4mpegpipe -: Output raw video to pipe. -
rav1e -: Read from pipe instead of file. -
--quantizer 80: Quality setting (lower = better quality, larger file).
Step 3: Choosing the Right Quality Settings
The quantizer value is your primary quality control. rav1e uses a scale from 0-255, where lower numbers mean higher quality.
Here's a practical conversion: If you're used to CRF values in x264 or SVT-AV1, multiply by 4. A CRF of 20 equals a quantizer of 80 in rav1e.
Recommended Quantizer Settings
- Archival quality: 60-70 (larger files, near-lossless).
- High quality: 75-85 (great balance for most content).
- Web streaming: 90-110 (smaller files, good visual quality).
- Low bandwidth: 120-150 (maximum compression).
Step 4: 10-Bit Encoding for Better Quality
Want even better results? Switch to 10-bit encoding. This reduces banding artifacts in gradients and dark scenes - a common problem with 8-bit video.
ffmpeg -i input.mp4 -pix_fmt yuv420p10le -strict -2 -f yuv4mpegpipe - | rav1e - -o output.ivf --quantizer 80
The -strict -2 flag allows FFmpeg to output 10-bit Y4M. Most modern devices handle 10-bit AV1 playback without issues.
Step 5: Speed Up Encoding with Tiles
For 4K content, tiling is essential. It splits the frame into sections that encode in parallel, dramatically improving speed on multi-core processors.
ffmpeg -i input_4k.mp4 -pix_fmt yuv420p10le -strict -2 -f yuv4mpegpipe - | rav1e - -o output.ivf --quantizer 68 --tile-columns 2 --tile-rows 1
The 2x1 tile configuration (2 columns, 1 row) works best for 4K. It improves both encoding speed and playback performance on lower-end devices.
Step 6: Adding Film Grain Synthesis
Here's a pro tip that can shrink your files significantly. The --photon-noise option strips film grain during encoding, then recreates it during playback.
ffmpeg -i input.mp4 -pix_fmt yuv420p10le -strict -2 -f yuv4mpegpipe - | rav1e - -o output.ivf --quantizer 80 --photon-noise 8
Values between 4-12 work well for most content. Higher values apply more synthetic grain. This is especially effective for grainy film footage or older content.
Step 7: Muxing Your Final Video
rav1e outputs raw IVF files. For a proper video container with audio, you'll need to combine streams using MKVToolNix or FFmpeg itself.
Extract audio first:
ffmpeg -i input.mp4 -vn -c:a libopus -b:a 128k audio.opusThen mux everything together:
ffmpeg -i output.ivf -i audio.opus -c copy final_video.mkv For web distribution, WebM containers work great with AV1 video and Opus audio.
For local playback, MKV offers better compatibility with players like VLC Media Player.
Using the rav1e GUI (Optional)
Command lines not your thing? The rav1e GUI provides a graphical interface that handles all the complexity. It automatically splits videos into segments, encodes them in parallel, and merges everything back together.
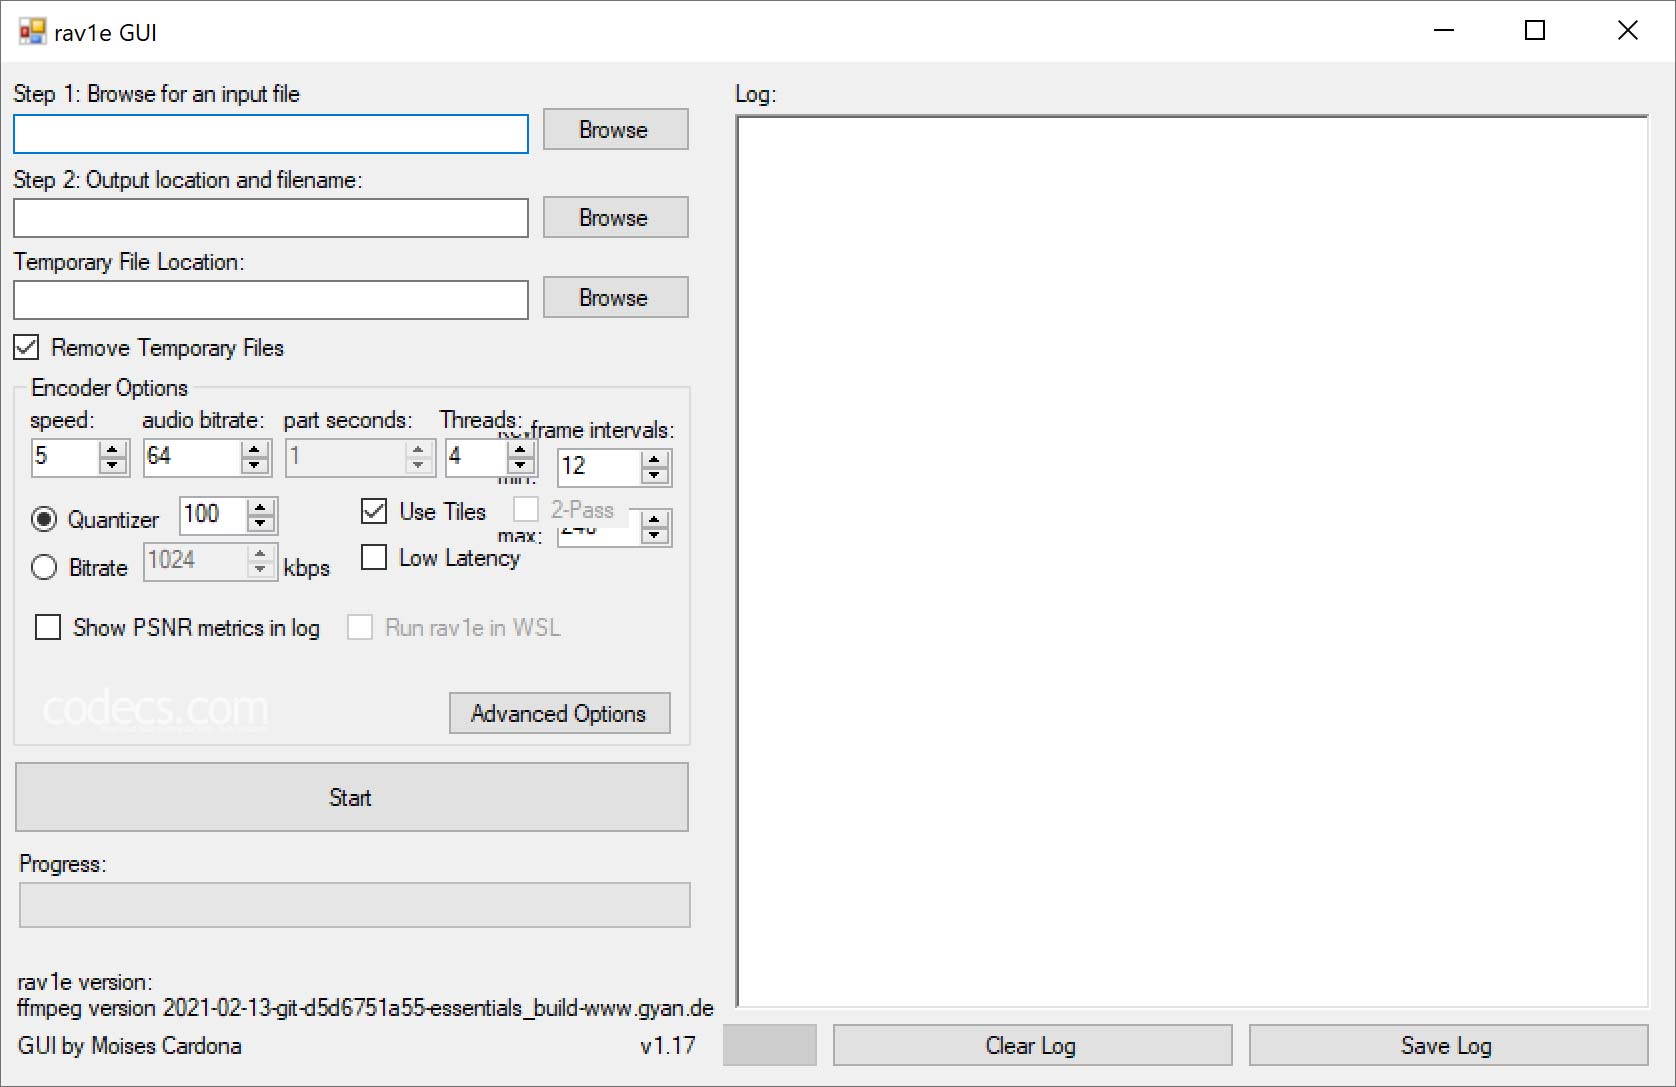
To use it, place ffmpeg.exe and rav1e.exe in the GUI's folder. The tool handles the conversion to Y4M, parallel encoding, and final muxing automatically.
Complete Example: High-Quality 1080p Encode
Here's a real-world command for encoding a 1080p video with excellent quality:
ffmpeg -i "My Video.mp4" -pix_fmt yuv420p10le -strict -2 -f yuv4mpegpipe - | rav1e - -o encoded.ivf --quantizer 75 --speed 6 --photon-noise 6
Then mux with audio:
ffmpeg -i encoded.ivf -i "My Video.mp4" -c:v copy -c:a libopus -b:a 128k -map 0:v -map 1:a final.mkv
The --speed 6 setting balances encoding time and efficiency. Lower speeds (0-4) produce smaller files but take significantly longer. Higher speeds (7-10) are faster but less efficient.
Troubleshooting Common Issues
Pipe errors on Windows: Some Windows terminals have issues with piping. Try using PowerShell instead of Command Prompt, or use rav1e GUI as a workaround.
Slow encoding: AV1 is computationally heavy. If encoding takes too long, increase the speed preset or use tiles for 4K+ content.
Playback problems: Not all players support AV1 yet. VLC handles it natively. For system-wide support, install the K-Lite Codec Pack or the AV1 Video Extension from the Microsoft Store.
rav1e vs Other AV1 Encoders
How does rav1e compare to alternatives?
vs libaom: rav1e is faster but produces slightly larger files at the same visual quality. Choose rav1e when encoding time matters.
vs SVT-AV1: SVT-AV1 offers better multi-threading on high-core systems. rav1e wins on simplicity and memory safety. For most users, both produce excellent results.
For batch processing or if you prefer a GUI workflow, tools like HandBrake now support AV1 encoding through SVT-AV1, offering an easier entry point for beginners.
Wrap Up
rav1e with FFmpeg gives you professional AV1 encoding without the complexity. Start with the basic commands, experiment with quality settings on short clips, then scale up to your full projects.


Free Popular IPTV Playlist: Where to Get Fres...
5/5Hey rei, That message is VLC's way of saying it went to the address and found nothing there. MRL ...
Read More →How to Use Helium Audio Converter: Convert An...
5/5@levi Yes, it works offline, it's a desktop software.
Read More →Meet Qwant: The Private, EU-Built Alternative...
4/5I didn't know it was EU, AND france. That doesn't sound like a good idea. Related to coding or ...
Read More →